
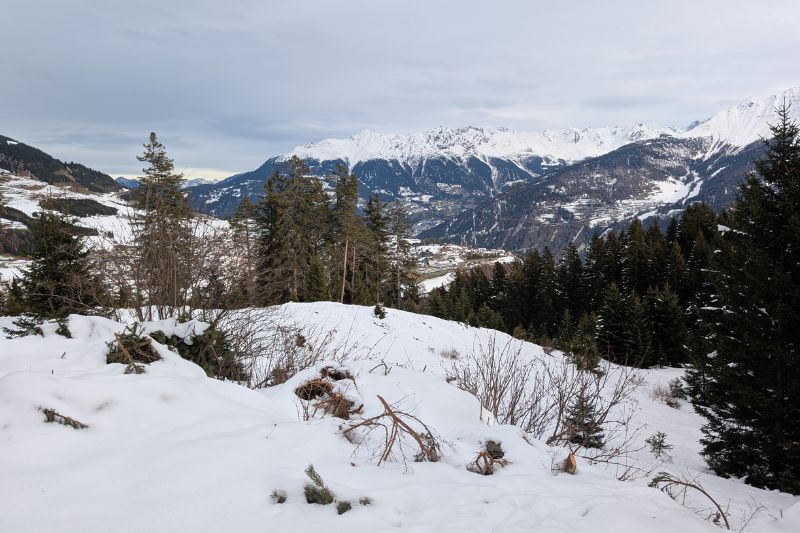
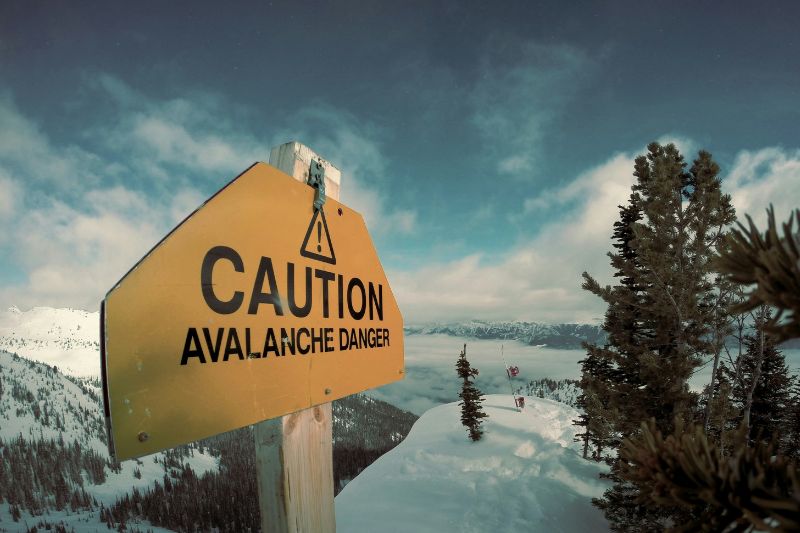
If you’re hiking or mountaineering in the Northern Hemisphere, chances are your route will take you where an avalanche can be a serious safety issue.
There’s no shortage of training courses out there, such as those offered by the American Institute for Avalanche Research and Education or the AIARE, that you can and should take to prepare for an avalanche. The gold standard for avalanche safety, however, is to avoid getting caught in one in the first place.
In this guide, you’ll find information on avalanche skills training, avalanche safety gear, snow types under the different types of avalanches, and what to do in case an avalanche should strike during your hike or climb. You’ll also find some helpful resources that we encourage you to check out for additional learning.
What is an avalanche?
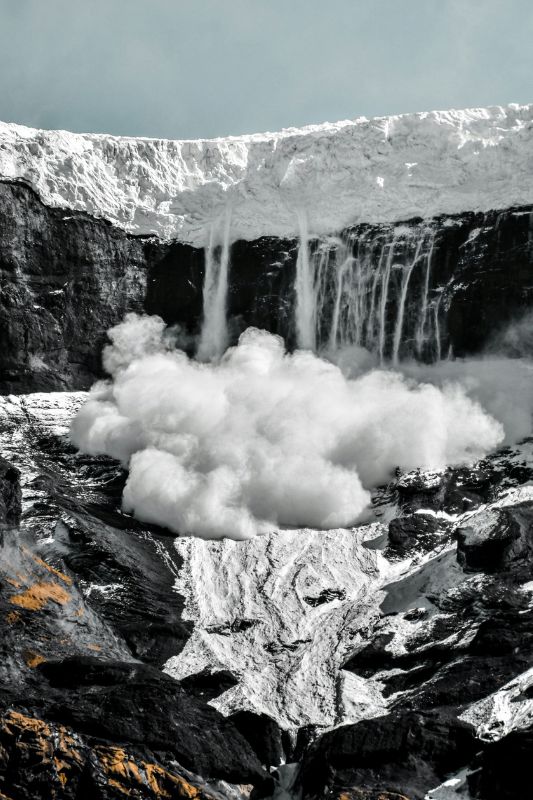
Very simply, an avalanche is a huge amount of snow falling down the side of a mountain. Avalanches have killed people enjoying the mountains for hiking, climbing, mountaineering, skiing, snowboarding, and other snow activities. At the time of writing, European Avalanche Warning Services reported well over 100 fatalities for the 2025-26 season.
Avalanches take place when the snow atop a mountain is unsteady, and the slope under it can be considered avalanche terrain. When wind, a person who happens to be walking or climbing, or another such trigger disturbs that snow, you get an avalanche. (Interestingly, yelling or making noise doesn’t actually cause avalanches.)
What are the different types avalanches?
Even if you have unstable snow atop a mountain and, say, a whole group of people walking around on it, you won’t get an avalanche if you’re not in avalanche terrain.
For it to be considered avalanche terrain, the slope has to be at least 30 to 45 degrees steep. Any slope that is less steep than this but is connected to a slope this steep can still be considered avalanche terrain.
Terrain Traps
Avalanche terrain becomes even more dangerous when it has rocks, trees, and other features like a crevasse or a gully because if an avalanche does happen, these features make it harder to rescue buried people. You might also hit or fall into one of these terrain traps during an avalanche and become seriously injured.
Other features you’ll need to look out for include:
- Cliffs
- Cornices
- Couloirs
- Seracs
- Slopes that rise or fall sharply
What are the different types avalanches?
Keep an eye out for the different snow types associated with each type of avalanche.
Cornice Falls
A cornice is a section of hardened snow overhanging the edge of a cliff, and if the cornice falls, it could cause a slab avalanche (see below), as well.
Dust
A dust avalanche can happen during a catastrophic snowstorm when wind causes snow to become bound fresh snow which, in turn, can lead to a slab avalanche (see below).
Glide
A glide avalanche takes place when the weather’s been warming up for some time, and there’s water under the snow causing it to fall down the slope. This kind of avalanche can be devastating with far-reaching effects, and you’ll see cracks in the snow running from the ground to the surface.
Icefall
An icefall avalanche is similar to a cornice fall, except that it’s a section of an ice cliff falling off a glacier. This type of avalanche could cause a slab avalanche in its turn, as well.
Loose Snow
This type of avalanche usually starts from one point and then spreads out, taking powder snow, cardboard snow, or loose snow on the surface along with it as it falls down the slope. Winter storms can bring on a Dry Loose Avalanche, while a Wet Loose Avalanche usually happens when surface snow gets warmed and then triggered by ice or rock falling on it.
Slab
A slab of cohesive snow can form after a storm (all year round), and while it can be dense, thick, and stable for a while, that slab can crack if it’s sitting on a weak layer of snow. An avalanche occurs once a cracked section falls. Storms in the spring or summer, and strong winds of more than 15 miles per hour24 km/h can also cause slab avalanches.
A Persistent Slab Avalanche happens when multiple layers of snow cover a layer of light or weak snow. This is the kind of avalanche that happens even after (sometimes, long after) a storm is over.
Surface hoar (often mistakenly called rime) is a snow type that forms on the surface of fallen snow instead of falling from the sky, making it easier for slabs to slide down a slope.
Where To get avalanche forecasts
You can get forecasts online such as this one for the US at avalanche.org or avalanche.ca for Canada. Avalanche forecasts are essential as they can tell you how likely an avalanche will occur, how serious it can become, and how big of an area it can affect. They can also tell you whether there have been recent avalanches in the area.
Forecasts can also advise you on whether you should head out at all, and give danger ratings for the risk. Find a guide for interpreting avalanche forecasts, here.
Weather Reports
If you can’t find an avalanche forecast for the area where you’ll be hiking or mountaineering, a weather report can help you decide whether or not you should push on with your expedition. Bad weather can be an avalanche trigger or unsettle snow. When checking a weather report, look for wind, freezing level, and precipitation, as well as temperature.
You should also be aware that avalanches can occur in warm weather, too, as melting can cause snow to become unstable. Storms that happen in summer can also set down enough new snow on mountain tops to cause an avalanche (maybe not as big, but even smaller avalanches can cause fatalities).
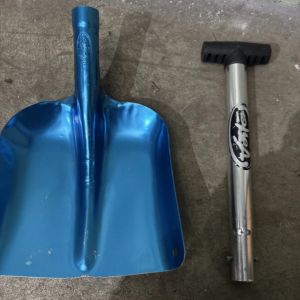
What avalanche safety gear do you need?
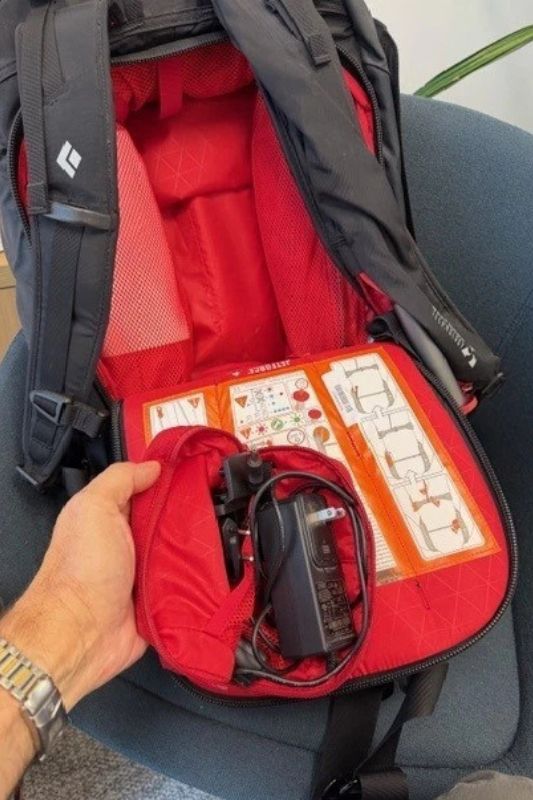
In addition to your mountaineering or hiking gear, don’t even think about heading into avalanche terrain without these three most important pieces of avalanche safety gear:
- Rescue beacon – A transceiver for guiding teammates or rescuers to a buried person.
- Snow probe – A light, collapsible pole for finding the exact spot and depth of a buried person.
- Shovel – For digging the person out.
Bonus: When navigating high-risk avalanche terrain, consider wearing an avalanche airbag backpack. The inflated bag helps keep you near the surface of the slide. If you do get buried, the airbag creates a vital air pocket beneath the snow, extending your oxygen supply.
What is included in avalanche skills training
Having complete safety gear means little if you don’t know how to use it right, and just having it certainly doesn’t guarantee you’ll survive an avalanche. Regular avalanche skills training is an absolute must (we say “regular” because you’ll need to update or at least practice to keep your skills sharp).
Avalanche skills training equips you for finding and rescuing buried fellow climbers or mountaineers. These skills include:
- Decision-making
- Recognizing hazards
- Rescue methods
- Avoiding triggers
Because avalanche injuries usually include fractures or trauma, many courses also teach you first aid or what to do in case of accidents.
Be sure to choose an avalanche skills training course specific to mountaineering, as mountaineers need to deal with crevasses, gullies, and the like, as opposed to the relatively safer conditions, for instance, for skiing. It’s also highly recommended to undergo avalanche skills training even if you won’t be hiking or mountaineering in the winter.
When you should not head out into avalanche terrain
It’s a bad idea to head out into an area where an avalanche has just taken place. Even if a forecast doesn’t tell you there’s been a recent avalanche, tell-tale signs of one include being able to see the face of the mountain where the snow has fallen away, and mounds of avalanche debris or clumps of snow on the ground.
You should also wait for a day or two before venturing into avalanche terrain where more than 12 inches30 cm of new snow has fallen.
How To head out safely into avalanche terrain
Try to plan your route to steer clear of gullies and other terrain traps, favoring gentler slopes, slope edges, and windward slopes instead. Choose camping stops in areas that aren’t likely to be hit by an avalanche, and be extra careful around slopes that get a lot of sun in spring, and that are in the shade in winter.
Have a backup plan in case the risk of avalanche makes it dangerous for you to continue on your planned route. If you’re not sure about a particular slope, assess the risk of an avalanche versus the risk of falling. If you decide to cross it, take extra care to lessen avalanche risk by:
- Crossing one at a time
- Taking long, smooth steps
- Going straight up the fall line
Most importantly, take avalanche skills training courses so that you know what to look out for and what to do if and when the time comes. Check avalanche forecasts and/or weather reports and have complete avalanche safety gear on you at all times (even when it’s not winter).
Finally, don’t take unnecessary risks, and hike or climb only with teammates you can trust and who have the proper training.
the warning signs of an imminent avalanche
Keep a sharp eye out for these danger signals while you’re out on your hike or climb:
- Whumpfing or the noise caused by snow breaking up under your feet
- Lightning cracks across the snow in front of you
- Weather suddenly worsening, whether that’s wind, rain, or more snow
- Layers of snow three feet0.9 meters over a snowpack that are frozen over or melting
- More than a foot30 cm of storm snow
- Isothermal snow (wet snow that doesn’t stick together about two to three feet0.6 to 0.9 meters deep)
What do you do if you’re caught in an avalanche
Presence of mind and doing your best to stay calm is key if you’re ever caught in an avalanche. Do your best to get out of the way of the oncoming avalanche by moving quickly to the side if it’s coming straight at you or the snow is dropping out from under you.
If getting out of the way isn’t an option or you find yourself being swept away, try to find a tree or a rock or some structure you can hold on to to keep yourself from getting swept away even further. If there’s nothing to hold on to, make upward swimming motions with your arms to try and keep yourself from being buried, and if possible, make your way to the surface of the avalanche debris.
Create An Air Pocket
If you aren’t able to make it to the surface, do your best to cross one arm in front of your face to create an air pocket to help you breathe under the snow. At the same time, stick your other arm straight up so that hopefully, your hand will be sticking out of the snow to help rescuers find you. The snow hardens as soon as it stops moving so try to do this as soon as you can.
An air pocket can boost your chances of survival as most avalanche fatalities are caused by asphyxiation. The survival rate of those who manage to create an air pocket may be small, but it has proven effective for those few.
How To you perform companion rescues
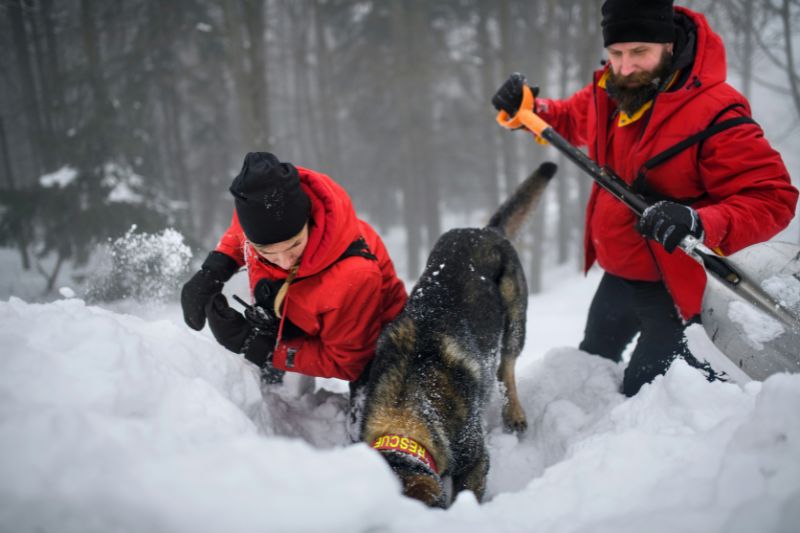
If someone on your team is buried by an avalanche, take steps to rescue that teammate now and go for help later. Going for help instead of rescuing buried teammates wastes precious time; the faster you can dig them out, the higher the chances of their survival. (Yes, we said teammates, because it can happen that multiple team members get buried at the same time.)
Bear in mind that a person needs to be dug up within 15 minutes after being buried in an avalanche; after that, the chances of survival start to drop. The methods outlined below may seem slow when you’re in a hurry to find someone, but when done systematically and smoothly, they will prove faster versus panicking and acting in a disorganized manner.
Finding Buried Teammates with a Beacon
Someone on your team must take charge immediately and begin the search. Your team leader needs to check whether another avalanche is on the way, and exactly who’s missing. Everyone’s beacons or transceivers need to be set to search instead of transmit or you may risk interfering with the signal of the person you’re looking for.
- Signal Search – Finding the signal of the buried person, starting at the point where the person was last seen and then zigzagging down the avalanche path, keeping the range of the beacon in mind and moving quickly and methodically.
- Coarse Search – Finding the location of the buried person by keeping an eye on the reading on your beacon (the number should be decreasing).
- Fine Search – Fine-tuning the location of the buried person by slowing down, holding the transceiver close to the ground and moving in a straight line, and in another, perpendicular line to find the spot with the smallest numerical reading.
- Probing – Finding the exact spot for digging the person out by inserting the probe at a 90-degree angle into the spot found during the fine search, repeating as necessary in a spiral path around the spot with 10 inches25 cm between insertions.
Be careful not to break the probe when you insert it, and not to insert it too forcefully. When you feel the person underneath with your probe, leave the probe in the ground.
Finding Buried Teammates without a Beacon
While having an avalanche beacon is standard safety protocol, it has happened that hikers or mountaineers get buried in an avalanche without a transceiver. When that happens, here are some steps you can follow:
- Look for traces of the buried person such as a boot or a glove sticking up out of the snow.
- Pick up the item to check if the person is still attached to it in some way.
- Leave the item in the exact spot where you found it.
- Probe around the item, including the area below and above it.
You can also probe areas where a person is likely to be buried, such as the uphill side of a rock, tree, mound, or anything that might prevent a person from being swept all the way downhill. Other good areas to probe include depressions or gullies and the very bottom or toe of the avalanche debris.
Digging Buried Teammates Out
You have to use proper shoveling technique to be able to dig about 2 to 3,000 pounds900 to 1,360 kg of snow or well over 3 feet0.9 meters deep. Your number one goal is to reach the airway of the buried person as soon as possible. Your second objective is to create a platform or stable surface as you dig so that when you pull your fellow mountaineer out, you have a place to lay that person down for first aid.
Other Sources For avalanche safety tips
Reading a guide like this one, or watching a YouTube video or two can never be a substitute for proper avalanche skills training or learning how to use avalanche safety gear the right way.
While we leave you with some additional resources for you to check out, we strongly encourage you to complete avalanche safety courses before you head out on your next hiking or mountaineering adventure.
- The Avalanche Factor
- Utah Avalanche Center – Recommended Reading
- Safety Academy Guide Book Snow Basic Avalanche Knowledge
- Avalanches and Climbing
- Avalanche Basics
- Basic Avalanche Safety
References:
- https://www.rei.com/learn/expert-advice/avalanche-basics.html
- https://americanalpineclub.org/news/2023/6/27/avalanches
- https://www.whittakermountaineering.com/blogs/whittaker-mountaineering-blog/avalanche-awareness-for-mountaineers?srsltid=AfmBOoo5kwVF89rNGFOStKfNY0XAFnu1CpAfM_Hh4dfdjxoNCVa5ZokK
- https://www.alpineinstitute.com/articles/avalanche-safety-how-to-avoid-getting-buried/
- https://www.youtube.com/watch?v=_Pq2Onm7RRQ
- https://www.youtube.com/watch?v=4TLGPpnzNyI
- https://powderguide.com/en/magazine/bergwissen/world-of-science-avalanche-discharge-by-sound
- https://www.avalanches.org/fatalities/fatalities-2025-26/#:~:text=Snow%20avalanches%20claim%20an%20average,people%20killed%20in%20an%20avalanche
- https://utahavalanchecenter.org/education/faq#:~:text=Statistics%20show%20that%2093%20percent,then%20the%20numbers%20drop%20catastrophically.


