
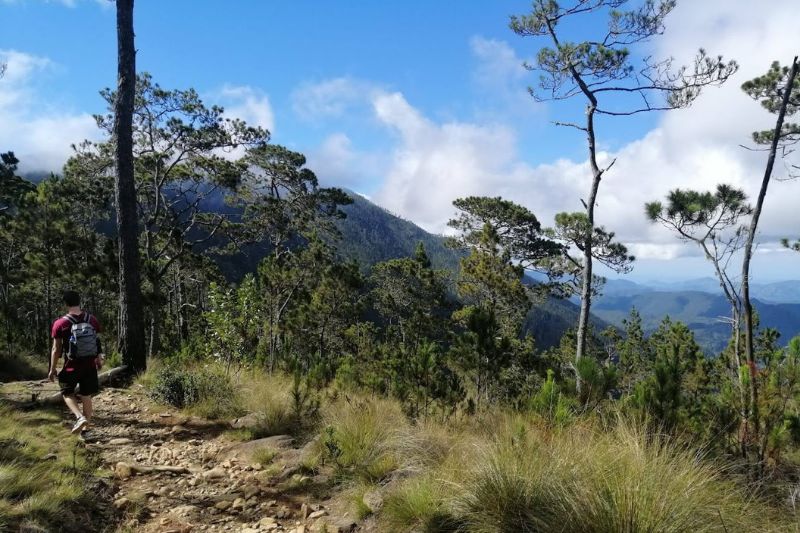
Last autumn, I was out with a group of friends in Austria. Beautiful weather, a light trail, nothing technical. We were simply enjoying the day. But one of us had mentioned he’d been dealing with shin splints, and somewhere around the halfway point, it caught up with him.
You could tell he was trying not to slow everyone down. By the time we finished, he could barely walk, and the whole second half of what was supposed to be a fun day turned into something nobody enjoyed.
That got me thinking. I wanted to actually understand what goes on inside your leg when this happens, not just the generic “rest and ice” advice you find everywhere.
So, I reached out to Dr. Ashley Katzenback, a physical therapist who’s been treating athletes for 20 years. Turns out she got into PT in the first place because she had shin splints herself as a high school athlete. Full circle.
In this guide, you’ll learn:
- What’s really happening inside your shin (it’s not what most people think)
- How to recognize the early warning signs
- Why descents cause the most damage
- A treatment plan built around the single most effective intervention research has found
- Tools that help, and one popular product that can make things worse
- How to prevent shin splints before your next hike
One thing before we get into it. Always get checked by a doctor first, especially to rule out stress fractures. What follows assumes you’re dealing with shin splints specifically.

DR. ASHLEY KATZENBACK
Owner Cape Concierge Physical Therapy
PT, DPT, CMTPT
Ashley Katzenback, PT, DPT, CMTPT is a Doctor of Physical Therapy who has been treating patients on Cape Cod since 2006. As a working mom, athlete, and lacrosse coach, she understands the real-life demands on the body—and the cost of being sidelined by pain.
Through her concierge physical therapy practice, Ashley helps patients identify and treat the root cause of pain rather than chasing symptoms. She is on a mission to help people avoid unnecessary surgeries, pain medications, and injections by delivering highly personalized, efficient care that respects both their health and their time. Ashley believes time is our most valuable resource, and her approach to care is built around maximizing results without wasting a minute.
What’s Actually Happening in Your Shin
Most people picture shin splints as pain running down the front of the leg. I did too. But for hikers, the real problem is usually behind the shin bone, not in front of it.
Doctors call it medial tibial stress syndrome, MTSS for short. Somewhere between 13% and 20% of runners get it, and the numbers go up when people suddenly ramp up their activity without preparation.
What’s happening at the tissue level is repeated microtrauma to the muscles and tendons along the tibia, plus irritation of the periosteum, which is the outer layer of the bone. Think of it like the bone’s protective wrapper getting aggravated from the inside out.
The most common causes for hikers include:
- Training errors — Sudden increases in hiking distance, intensity, or frequency. Someone picks up a new activity without enough foot strength or with sloppy form, and the extra pounding catches up fast.
- Weak lower-leg muscles — Especially the posterior tibialis and intrinsic foot muscles
- Flat feet or overpronation — Changes the angle of force on the posterior tibialis tendon
- Poor footwear — Either too much cushioning (masks fatigue) or too little support during recovery
- Downhill hiking — Eccentric loading on descents puts the most strain on the tibialis muscles
- Cold conditions — Reduced blood flow makes tendons stiffer and more vulnerable. And this is where hikers specifically run into trouble.
Two Muscles, Two Types of Pain
Two muscles are behind most shin splint cases, and they hurt in different places:
- Anterior tibialis (the anterior shin muscle) — This one runs along the front of your shin bone. Pain shows up on the outer front of your leg. You know that slapping motion your forefoot makes when it hits the ground on a steep descent? That’s what sets it off.
- Posterior tibialis — Sits behind the shin bone, which is why most people don’t think of it. Its tendon runs down behind the ankle, splits into two, and attaches to the bones in your foot. It’s doing a lot: controlling your arch, inverting your foot, and managing the heel-to-toe transition on every single step you take.
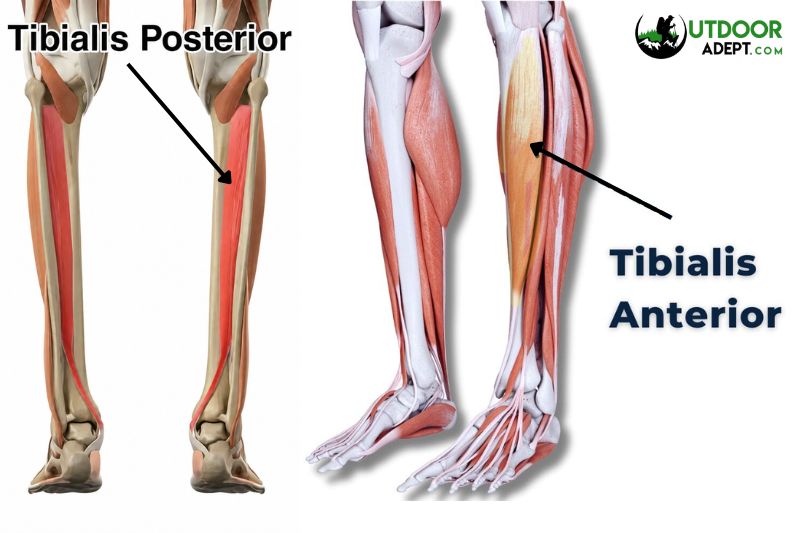
I figured anterior shin muscles were the bigger deal for hikers, but when I asked Ashley about this, she pointed me to the posterior tibialis instead. That one is the real troublemaker on the trail, and the pain from it tends to show up lower than you’d expect, closer to the ankle, because that’s where the tendon attaches.
Researchers found that excessive eccentric contractions in those deep posterior muscles create a “tenting effect” on the tibial fascia. Basically, the muscle pulls the bone’s outer layer away from the bone itself.
Why Descents Do the Most Damage
Think about how you walk downhill. Most people just let gravity do the work. You fly down the trail, step after step, without much thought about controlling the landing.
That’s the problem. When you descend, your posterior tibialis has to eccentrically contract to slow down the motion of your foot. It’s acting as a brake. And because we rarely train that braking motion in daily life (we climb stairs with power, but we just plop down them), these muscles tend to be weaker.
According to a 2025 randomized controlled trial in the Orthopaedic Journal of Sports Medicine, the eccentric contractions of the deep posterior muscles create a significant traction force on the tibial fascia during activity. In plain terms, your muscles are pulling on the tendon, which pulls on the bone with every step down.
The Flat Feet Connection
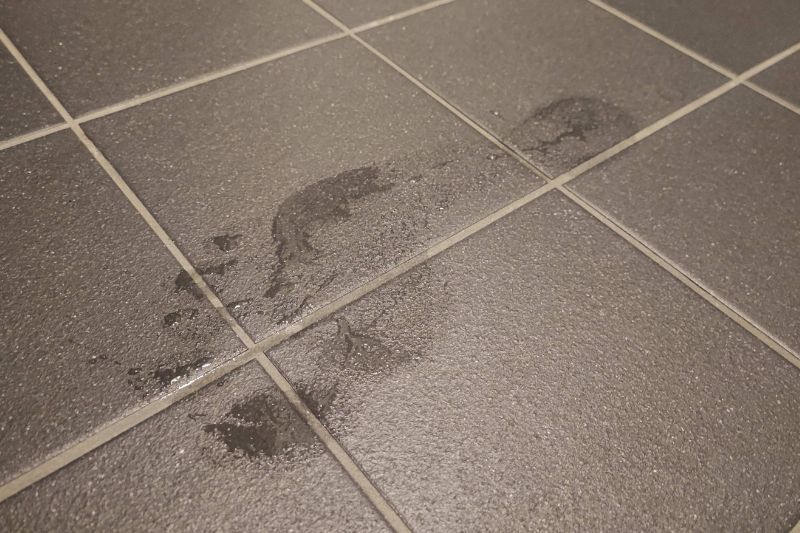
If you have flat feet or tend to overpronate (that’s when your foot rolls inward too far on each step), the mechanics get worse. The angle of pull on the tendon shifts, more stress piles onto it, and the muscle has to compensate for an arch that isn’t doing its share of the work.
I was wondering how these two conditions feed into each other, and Ashley explained that this is a two-way street. A strong arch enables the posterior tibialis to shorten and contract at its optimal angle. Strong posterior tibialis holds the arch up. Let either one go, and you’re in trouble with both.
This is why flat feet and shin splints so often travel together. The relationship also extends to plantar fasciitis, which shares many of the same underlying causes. Ashley has a clear plan on how to fix your flat feet that you can find here.
How to Recognize Shin Splints
Watch for these early warning signs:
- Low inner-leg ache — Pain just above the ankle bone on the inside of your lower leg
- Dull throb with warmth — A throbbing sensation, sometimes with heat at the site, and the urge to rub the area
- Pain that travels upward — Starts near the ankle and can spread up the inside of the shin over time
- Hidden tenderness below — When you press around, the real source of pain is often closer to the foot than where you first feel it
- Activity pattern — Pain that loosens up as you warm into a walk, then returns worse after you stop
Shin Splints vs. Stress Fractures
Worth knowing the difference. A stress fracture hits one specific spot. You press it, and it hurts. You walk, and it hurts. It doesn’t get better as you warm up. Shin splints are messier than that. The pain spreads over a few inches, sometimes eases up once you get moving, then comes back harder after you stop.
If the pain is pinpoint and getting worse, get imaging done. Don’t sit on it. Shin splints can progress into stress fractures if you ignore them long enough, and by that point, you’re looking at a much longer recovery.
Should You Keep Hiking With Shin Splints?
Pushing through shin splint pain almost always extends your recovery timeline. My friend from that Austria hike is a perfect example. What started as a manageable ache turned into weeks off the trail because he didn’t stop when he should have.
Hiking through shin splints typically leads to:
- Worsening inflammation and tendon damage
- Extended recovery timeline
- Risk of progression toward a stress fracture
- Compensatory injuries from altered gait
If shin splints hit during a multi-day hike, you can manage them in the short term with the tools covered below. But once you’re off the trail, rest and treat before going back out.
“The biggest misconception about shin splints is that people think they can fix them with footwear. Footwear is a tool. Strengthening is the actual fix.”
– Dr. Ashley Katzenback
Treatment Plan for Hikers Dealing with Shin Splints
If you’re looking for shin splint relief that actually lasts, it starts with understanding what the research says works and what doesn’t.
Eccentric Strengthening: The Single Best Treatment
This is the centerpiece. When I asked Ashley what single thing she’d recommend for shin splints, the answer was eccentric strengthening. All of the research points to it as the most effective intervention for tendonitis. Not just for shin splints. For all tendonitis, in any part of the body.
Eccentric exercises train the controlled lengthening of a muscle under load. The lowering phase of a calf raise. Walking slowly down a flight of stairs. Decelerating on a downhill trail. These movements build exactly the kind of strength your posterior tibialis needs to handle the demands of hiking.
Here are the exercises she walked me through.
Eccentric Heel Raises (Barefoot)
- Stand by a wall or something sturdy for balance, feet shoulder-width apart
- Dome your feet, then lift your heels off the ground as high as you can
- Without losing height, lift one foot off the ground
- Slowly lower yourself back down on the single leg
- Repeat on both sides. Go barefoot so your feet actually feel what’s happening underneath
You should feel your feet and calf muscles working, especially on the side that stays on the ground. Don’t let your knees bend, don’t lean forward or to the side, and try not to rely too much on your arms for balance.
Single Leg Calf Raise (Captain Morgan)
- Find a bench or other surface that is at knee height and put one foot on top while keeping the other foot on the ground.
- Push yourself up with the toes of your bottom foot.
- Slowly return to the starting position and repeat.
- Switch legs between sets.
This shin splint exercise is the next level from the previous exercise because we are now isolating one calf. Add weights if you want to push it even further.
Heel Raises in a Wall Squat
- Back against the wall, feet about a foot away, shoulder-width apart
- Lower yourself until your thighs are parallel to the ground, knees over your toes
- While holding that position, perform heel raises
Builds the quad and calf endurance you actually need for long descents. Keep your body still, only your knees and heels should be moving up and down.
Heel Raise with Ball Squeeze
- Place a tennis ball, lacrosse ball, or any small round object between your heels
- Squeeze the ball with your heels and maintain that tension the entire time
- Push up with your toes, raising your heels, keeping all toes working at the same time
- The goal is to keep the ball between your heels throughout
Simple setup, surprisingly effective. Control the motion and don’t rush it. Ashley demonstrates this exercise in the third segment of the video below.
Single Leg Woodpecker
- Stand balancing on one leg with a good arch position
- Lean forward, shifting your weight and center of gravity toward your toes
- Go just until the point where you can control it without letting your heel lift off the ground
- Push the front of your foot into the ground to return to starting position
You’ll wobble. That’s normal and kind of the point, because this is exactly the kind of reactive balance uneven terrain demands. Keep your body straight, don’t fold at the hips or arch your back. Let your calf and foot muscles do the work.
Toe Curls
- Sit down barefoot (progress to standing once you’ve got it down)
- Keep your arch lifted by doming your foot
- Curl your toes into the ground as far as you can, hold for a moment, then return
- When done correctly, your arch will raise in height, and your foot will shorten into a dome shape
You should feel your arch tighten up. Don’t lift your foot off the ground or move it side to side.
One thing about shin splint stretches. Calf stretches are fine as part of a warm-up, but don’t lean on them as your main treatment. The research pretty consistently shows eccentric strengthening outperforms stretching alone, and it’s not particularly close.
Supportive Tools
Exercises do the heavy lifting, but a few tools can help alongside them.
Lacrosse Ball / Trekking Pole (Soft Tissue Work)
Get a lacrosse ball under your calf. Sit with your legs out, put the ball underneath, and press your body weight into it with your hands. Roll around, find the tender spots, spend some time on them. It’s not pleasant, but it works.
On the trail, you can use a trekking pole for the same thing. Press it along the outside of the shin bone, below the knee to above the ankle, firm but not brutal. A minute or two at the first hint of tightness makes a real difference.
Kinesiology Tape (KT Tape)
I was skeptical about using KT for shin splints. But kinesiology tape along the posterior tibialis does seem to do a few useful things. It gives the muscle proprioceptive feedback, like a reminder to activate properly. Tape on skin also reduces shin pain on its own, which is well documented, even if it sounds too simple.
And then Ashley told me that in her practice, she’s looked at muscles under ultrasound with and without tape, and the tape appears to lift the skin and fascia just enough to let the muscle glide more easily and contract more effectively.
It won’t restrict your movement. It won’t prevent the injury from happening. But as a tool to use alongside strengthening, it’s worth trying.
Compression Socks (Not Calf Braces)
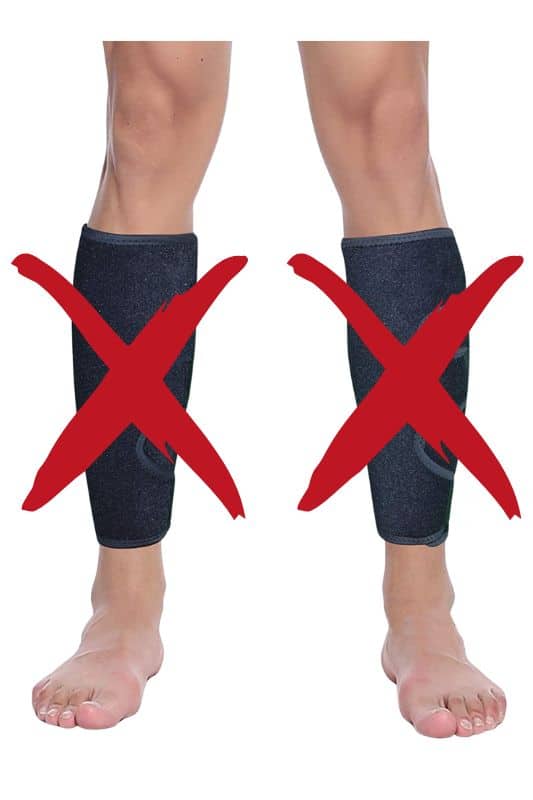
This is where a lot of hikers go wrong. Calf braces that wrap tightly around just the calf create a tourniquet effect right where the posterior tibialis tendon runs. They cut circulation at the exact area you’re trying to heal.
Full-length compression socks from toe to calf are the better option. They improve blood flow throughout the entire lower leg without pinching the tendon.
If you’re shopping for hiking socks in general, our best hiking socks roundup covers compression options alongside regular trail socks.
Proper Warm-Up
Never stretch a cold muscle. Walk for five to ten minutes first. Let the blood reach your lower legs. Then stretch. Then continue your hike.
Ashley also recommends rolling a lacrosse ball under your feet before you set out, not just your calves. Gets blood moving into the foot and wakes up those smaller muscles.
Cold Weather and Mountain Terrain
If you hike in cold conditions or at altitude, shin splints demand extra respect. Cold constricts your blood vessels, tendons with their already lousy blood supply get stiffer, more brittle. Add uneven terrain to that equation, and your foot simply can’t adapt fast enough.
Every early-season hike I do reminds me of this. Frozen trail at 7 am, soft mud by noon, and your feet have to handle both.
Longer warm-ups, compression socks, proper insulation for your feet. Not optional out there.
How to Avoid Shin Splints For Your Next Hike
Treating shin splints is one thing. Not getting them in the first place is better. Most of what follows comes down to preparation, and none of it is complicated. It just takes consistency.
Start Strengthening Early
Give yourself at least four to six weeks of consistent eccentric training before a major hike. The exercises above are your foundation.
One trail-specific tip Ashley mentioned that I hadn’t heard before: walking uphill backwards. It works a similar muscle group to the eccentric heel raises, but in a functional, weight-bearing way. Strange looking, but if you’ve got a quiet stretch of trail, it’s worth adding to your routine.
Build Distance Gradually
Don’t increase your hiking distance or time by more than 10% per week. Sudden jumps in activity are one of the most common MTSS triggers.
Strengthen Your Glutes
When you walk, your right calf and left glute fire together, and vice versa. It’s a cross-body pattern built into human gait. Strengthening your glutes directly improves how well your calves perform. Squats, bridges, lunges — all indirectly helping your shins.
Use Trekking Poles on Descents
Trekking poles distribute the load away from your lower legs during the descents that cause the most damage. They won’t replace strengthening, but they reduce the total eccentric demand on your posterior tibialis with each step.
Shorten Your Stride Going Downhill
Shorter steps on descents. Midfoot strike instead of slamming your heel out in front of you. It sounds too simple to work, but it genuinely reduces how hard your shin muscles have to brake on each step.
What Shoes Are Best for Shin Splints?
Footwear comes up in almost every conversation about shin splints. Most of the advice out there leans toward more support, more cushioning. Ashley sees it differently.
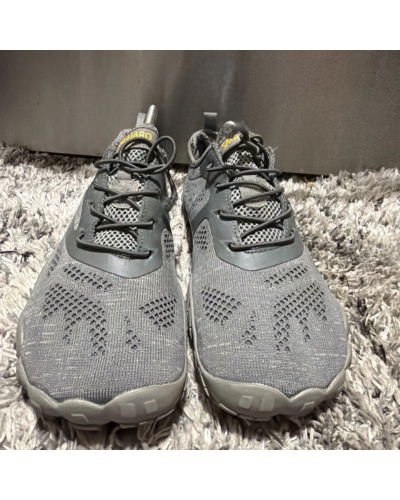
Why Ashley Recommends Less Cushioning
I asked Ashley whether shoe choice could make a real difference. She actually thinks minimal or zero-drop shoes are better for building foot and ankle strength long term because your feet get real feedback from the ground. You feel a root before you roll over it. You react faster on loose rock.
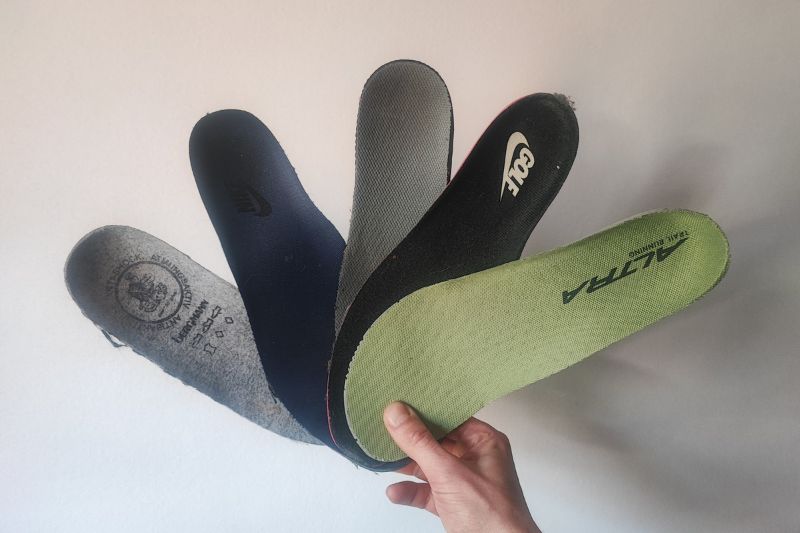
The Padding Problem
She gave me a bit of a history lesson, too. Runners originally wore completely flat shoes. Converse, basically. They could only run as far as their feet would let them, and when their feet got tired, they stopped.
Then a couple of shoe companies figured out that if you add enough padding, runners can’t feel their fatigue anymore. So they ran more miles. And the shoes got more padded. And the miles went up. But the injuries didn’t go down.
She’s not trying to take down Nike or anything. But her point is that all that padding between your foot and the ground blocks the feedback your body relies on. Your feet get tired, they try to tell you, and you can’t feel it through an inch of foam. So you keep going. And that’s when shin splints happen, or stress fractures, or worse.
We put together a roundup of the best barefoot hiking boots if you want to explore zero-drop options for training.
When to Use Supportive Shoes Instead
That said, if you’re in the middle of an active shin splint problem, going minimal right away is not the move. Supportive shoes while you build strength, then gradually transition to less support for daily use.
Keep your hiking boots for the trail. And if flat feet are part of the equation for you, our guide to the best hiking boots for flat feet is worth a look.
There’s some interesting research moving in this direction, too. A 2026 randomized trial in the Annals of Internal Medicine found that flat, flexible shoes did just as well as stable, supportive shoes for managing hip pain.
Different condition, sure, but the trend in the literature is pretty consistent. More support does not automatically mean better outcomes.
Gear Recommendations
Based on our testing and what we’ve covered in this guide, here are specific products worth considering.
Recovery Phase
Prevention and Strengthening Phase
| Item | Our Pick | Why It Works |
|---|---|---|
| Trekking poles | Any adjustable pair | For reducing eccentric load on descents. Not about the brand, just use them |
| Hiking socks | Darn Tough Hiker | Merino wool, moderate cushion, lifetime warranty. The standard for a reason |
| Hiking boot (flat feet) | KEEN Targhee IV Mid | Roomy toe box, compression-resistant midsole, lifetime delamination guarantee |
| Barefoot training shoe | Altra Lone Peak 9+ | Zero-drop, wide toe box, lets your feet do the work. Our top pick for building foot strength |
FAQs
Press along the inside edge of your shin bone with your thumb. Go slow. Shin splints hurt over a broad stretch, usually a few inches. If you find one single spot that really hurts, that’s different. That could be a stress fracture, and you want imaging for that.
Depends what you’re rubbing. Working into your calf muscles with a lacrosse ball or your hands can help a lot. But don’t go digging into the bone where it’s tender. That tends to make things angrier. If it gets sharper when you press, leave it alone.
Starts as maybe a 3. That low ache you notice on a descent and then forget about at camp. People push through that stage for weeks. By the time they actually stop, it’s a 7 that won’t quit, and recovery takes way longer than it needed to.
Shin splints don’t show up well on X-rays. What X-rays are good for is ruling out a stress fracture. If your doctor wants to actually see what’s going on with the bone surface, an MRI is the one that catches it.
On its own, no. But low vitamin D means weaker bones, and weaker bones don’t handle repetitive loading as well. It’s been flagged as a risk factor in the research. If you’re doing everything right and still getting shin problems, your vitamin D levels are worth checking.
Ice when you get back from a hike to calm things down. Heat or a warm-up walk before you head out so the tissue isn’t cold and stiff. On the trail, sticking your legs in a cold stream on a break works. Just don’t start a hike on cold, stiff tendons.
Not on its own. But when you’re dehydrated, you fatigue faster, and when you fatigue, your form gets sloppy. Heavier foot strikes, less control on descents. It’s not the cause, but it makes everything else worse.


")
")
")
")