Reviewed by:

DR. ANTIGONE VESCI
Founder of AV Performance Therapy
PT, DPT, ATC, SCS, FAAOMPT, CMTPT
Antigone is a Sports Certified Specialist and the founder of AV Performance Therapy. She currently serves as the Director of The Edge Performance Therapy in Glenview, Illinois, and is an adjunct faculty member at Northwestern University.
She earned her Bachelor of Science in Athletic Training in 2012 and her Doctor of Physical Therapy in 2014 from Boston University’s College of Health and Rehabilitation Sciences: Sargent College. In 2017, she completed her Fellowship in Orthopaedic Manual Therapy at the University of Illinois at Chicago.
Antigone’s work focuses on teaching and mentoring clinicians in clinical reasoning and evidence-based practice. Clinically, she specializes in treating the aging athlete, as well as patients with acute or chronic neck and low back pain. She also has a strong interest in temporomandibular joint (TMJ) dysfunction, frequently treating and presenting to dentists and other specialists on interdisciplinary approaches to its management.
Let’s admit it – going on trails usually leads to knee pain.
And research shows that people with knee pain tend to walk fewer steps and spend less time active during their leisure time. This creates a problem: less activity means weaker muscles, which puts even more stress on your knees.
Here’s the good news: contrary to the old “knees only have so many miles in them” belief, moderate exercise actually strengthens your knees, improves stability, and builds resilience. It can even reduce your risk of knee arthritis.
So, instead of avoiding the trails, let’s focus on building genuine strength in your knees, turning them into reliable partners on any path.
What improved my hikes wasn’t a magical fix, but a steady, step-by-step approach to strengthening my knees. Throughout this process, I was guided by my physical therapist, Dr. Antigone Vesci. She’s the mastermind behind this workout plan.
This guide breaks down the practical strategies I used to fight knee pain while hiking. We’ll look at specific exercises to strengthen your knee-supporting muscles, stability techniques to improve your form, and gear choices that can genuinely help. Let’s get started!
How to Build Up Knee Strength for Hiking? (A 6-Step Exercise Routine)

For hiking-specific knee conditioning, focus on endurance over pure strength. Building muscular endurance is key to preventing knee pain when walking downhill and maintaining stability on long trail days.
Aim for 3 sets of 12-20 repetitions for each exercise, 2-3 times weekly. Once you can comfortably complete 20 reps with proper form, increase the difficulty by adding weight or progressing to a more challenging variation.
If you’re new to these exercises, build your foundation first with 5-8 reps at a heavier weight. Once you can hit 8 clean reps, bump up the resistance.
Quick Tip #1: When it comes to building knee strength, consistency beats intensity every time. I learned this the hard way after pushing too hard, too fast, and sidelining myself for two weeks. Focus on completing more reps with proper form rather than making the exercises harder prematurely.
Quick Tip #2: You’ll need patience here. It takes 6-8 weeks of consistent training before you start to see a serious effect on your body.
“Strength is how much weight your muscles can lift once; endurance is how many times they can keep lifting it.
– Dr. Antigone Vesci
Strength helps your performance on the trail, but endurance is what keeps you from getting hurt along the way.”
1. Stationary Lunges or Step-Ups

I’m putting this exercise first because it’s practically identical to what you do while hiking. Every step uphill or controlled descent engages the exact same muscle groups you’ll use on the trail.
These exercises build strength and stability in your quads, hamstrings, and glutes, the powerhouse muscles that propel you uphill and protect your knees downhill.
- How to do it: Stand with your feet hip-width apart. Step forward with one leg, lowering your hips until both knees are bent at 90-degree angles. Keep your front knee aligned with your ankle and your back heel slightly lifted. Push through your front heel to return to the starting position. Repeat on the other side. For step-ups, use a sturdy bench or step that allows you to reach a 90-degree knee bend.
- Make it harder: Hold dumbbells in each hand or add a weight vest.
- Spice it up: Try walking lunges where you take a step forward, lunge, and then push through to another lunge with the same leg before switching sides. Stronger leg muscles mean you’ll power up inclines with ease and descend with control.
2. Banded Side Steps

Nobody talks enough about how important your glutes are for keeping your knees stable. First time I did this exercise, I was genuinely surprised by how much burn I felt, and then a few weeks later, steep climbs that normally had my knees complaining felt way more manageable.
- How to do it: Loop a resistance band around your legs. If you’re new to this, keep it up by your knees. Stand with your feet about hip-width apart, then drop down just a little into a quarter squat – not deep, just enough to feel it. Keep that band tight and take tiny sideways steps to the right, 10-15 of them, then turn around and step your way back left. The catch? You’ve got to stay in that squat position the whole time. Don’t pop up between steps. Your glutes should be burning throughout.
- Make it harder: Move the band down to your ankles. After that, if you’re feeling bold, you can go all the way to your feet. I’m at the ankle level now, and it’s no joke – way tougher than having it at your knees. You can also just grab a thicker band once the current one gets too easy.
- Spice it up: For an additional challenge, try stepping forward and backward instead of side to side. This hits your glutes from different angles and really tests your stability.
3. Bent Knee Fall Out
This one works your hip abductors and external rotators. Honestly, I didn’t even know what those were until my physical therapist pointed out how weak mine had gotten.
Turns out they’re pretty important for keeping your knees lined up right when you’re scrambling over rocks and dealing with uneven ground.
- How to do it: Get on your back and loop a resistance band right above your knees. Bend both knees, feet flat on the floor about hip-width apart. Now push your hips up into a bridge. Squeeze those glutes hard at the top. While you’re holding that bridge up there, slowly press your knees outward against the band, then bring them back in. Make sure there is constant tension on the band at all times, and your knees don’t go inwards. The whole time, your hips need to stay up. That’s actually the hardest part.
- Make it easier: When I first tried this, I couldn’t keep my bridge steady and do the knee thing at the same time. So start without any band. Just practice the bridge and the knee movement separately until your body figures out the coordination. Then add a light band.
- Make it harder: Once this starts feeling manageable, grab a heavier band. I went from a wimpy light band to a medium-heavy one over a couple of months. Another trick: hold your knees out for a few seconds (2-3 works) before pulling them back to center. Fair warning – that pause absolutely kills.
- Spice it up: For an extra burn, try doing single-leg variations on each side before returning to the double-leg version. Your stabilizing muscles will be screaming, but it’s incredibly effective for building trail-ready strength.
4. Forearm Plank with Heel or Arm Lifts

This exercise strengthens your core, shoulders, and glutes, improving overall stability and balance, essential for navigating tricky paths without a knee complaint.
- How to do it: Get into a forearm plank position with your elbows shoulder-width apart and forearms flat on the floor. Engage your core and keep your body in a straight line from head to heels. Slowly lift one heel off the ground, hold for 1-2 seconds, then lower. Repeat with the other leg.
- Make it easier: I used to struggle with holding the plank for 30 seconds, so I started with shorter holds and gradually increased the duration. Consistency is key!
- Make it harder: Once heel lifts become comfortable, progress to arm lifts. Extend one arm straight forward while maintaining your plank position, hold for 1-2 seconds, then lower and switch arms. This challenges your stability even more and better mimics the dynamic balance required on technical trails.
5. Single Leg Pistol Squats with Chair

Trails don’t give you nice, even ground to work with. Your legs have to handle things independently, dealing with whatever rocks or roots show up under each foot.
Single-leg squats build that eccentric strength, basically the muscle control you need going downhill, so your knees aren’t crying by the time you reach the bottom.
- How to do it: Position yourself facing away from a solid chair or bench. Pick up your right foot so it’s hovering off the ground. Now here’s the key part – you’re going to lower yourself down to that chair using just your left leg, and you need to take your time with it. Aim for 3-4 seconds on the way down. Your butt should barely kiss the chair, then drive through your left heel to stand back up. Do all your reps on one side before you switch over.
- Make it easier: Starting out, use a taller chair or stack some boxes to make it higher. That cuts down how far you need to go. You can also keep one hand on a wall or doorframe for balance while you’re getting the hang of it. I definitely clutched onto my doorway for at least two weeks before my balance caught up.
- Make it harder: Once you’ve got it down, try a lower chair. Eventually, you can ditch the chair completely and go for full pistol squats. Adding a light dumbbell at chest height cranks up the difficulty, too. Though I’ll be real with you – even just bodyweight pistols are brutal.
6. Deadbugs

Don’t let the silly name trick you. Deadbugs are legit hard. What this does is teach your core to keep everything stable while your limbs are moving around, and that’s exactly the kind of body control you need when you’re picking your way across sketchy rock fields or sliding around on loose scree.
- How to do it: Get on your back, stick your arms straight up pointing at the ceiling, and bend your knees to 90 degrees so your shins are just hanging there parallel to the floor. Jam your lower back flat against the ground. Then you’re going to slowly drop your right arm back over your head while your left leg straightens out at the same time, and both should head toward the floor but not actually touch. Pull everything back to where you started and do the opposite – left arm back, right leg out. Take your time with this. Rushing defeats the whole point.
- Make it easier: This exercise has a natural progression that saved me when I first started. Begin with just your arms – practice lowering one at a time overhead while keeping your lower back glued to the floor. Once that feels comfortable, move to legs only, extending one at a time while keeping your arms still. Then combine them with opposite arm and leg movements like described above.
- Make it harder: Pick up a small dumbbell or weight plate. I’ve been using 5 pounds, and wow, it’s way harder than you’d think. Once you’ve mastered single arm and leg, progress to double arm and leg extensions – both arms go back while both legs extend simultaneously. It’s brutal on your core.
- Spice it up: You can also loop a resistance band around the arches of your feet to add tension, or strap on ankle weights for extra resistance. Another option is pausing at the bottom when everything’s stretched out, which I do for 2-3 seconds when I really want to feel the burn.
Tips to Avoid Knee Injury on the Trail

Knee pain while hiking used to be my constant companion, stealing the joy out of countless adventures. But after years of trial and error, I’ve cracked the code. Here are some tips to help you conquer those trails with pain-free knees:
Choose the Right Shoes
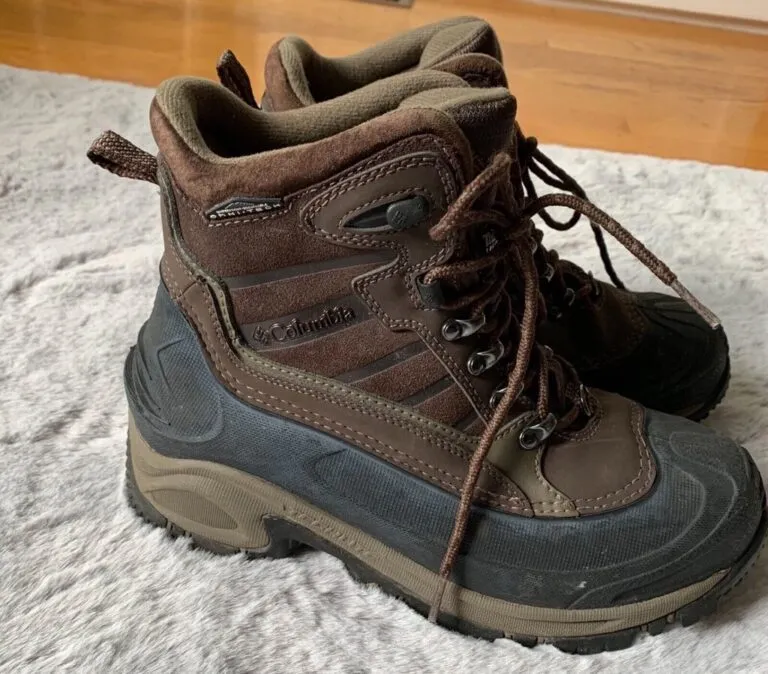
I learned the hard way that sneakers or worn-out boots just don’t cut it. They left my knees screaming after every downhill stretch. But once I invested in well-fitting, supportive hiking boots specifically designed for my terrain and weight, the difference was incredible.
The right hiking boots provide crucial ankle support, a sturdy sole with aggressive tread for grip, and cushioning that absorbs impact. A few extra bucks upfront can indeed save you a world of pain down the trail.
Warm-up

Think of your pre-hike routine like preparing your body for a tough workout. Just like athletes wouldn’t jump straight into a heavy lift, don’t subject your knees to the demands of the trail without proper preparation.
Dedicate 10-15 minutes to dynamic stretches like leg swings, spine twists, and lunges. This loosens up your joints and gradually increases your heart rate, priming your body for the adventure ahead. [1]
Don’t Push Yourself Too Hard
The peak might be calling, but pushing beyond your limits is a recipe for knee trouble, especially for those of us hiking with bad knees.
Start with trails that match your fitness level and gradually increase difficulty as you get stronger. There’s no shame in taking breaks, adjusting your pace, or even turning back if your knees start to grumble. Your body is your best guide – listen to it!
Maintain Good Posture
Engage your core, stand tall with relaxed shoulders and a straight back, and ditch the slouch. Imagine a string pulling you up from your head, keeping your spine elongated and aligned.
This distributes stress evenly across your joints, reducing strain on your knees, especially when navigating uneven terrain.
Take Smaller Steps
Long, powerful strides might look impressive, but they can be brutal on your knees, particularly downhill. Instead, shorten your stride and focus on taking more controlled, lighter steps.
This reduces the impact on your joints and makes it easier to navigate uneven ground. As I like to think of myself and all my fellow hikers, we are nimble mountain goats, not galloping horses.

Use Trekking Poles
Forget the grandparent stereotype! Trekking poles offer incredible support and stability, especially on descents. They engage your upper body, taking stress off your knees and helping you maintain balance on uneven terrain.
Check out this article on how to use trekking poles effectively.
Zigzag on Steep Inclines
Remember those intense downhill stretches that had your knees screaming? Yeah, me too. But then I discovered the magic of the zigzag. Instead of tackling the slope head-on, I started weaving gently from side to side.
This might seem longer, but trust me, it’s a scenic detour your knees will thank you for. It reduces the overall steepness, distributes the impact more evenly, and makes the descent a whole lot more enjoyable.
Stay Hydrated
Dehydration is the ultimate party crasher, and it doesn’t discriminate against your joints. I pack plenty of water and sip regularly, especially on hot days, to reduce knee pain when hiking. Aim for around 1 liter every 2 hours. [2]
Choose Appropriate Trails
If you’re new to hiking or have existing knee issues, opt for well-maintained paths with moderate inclines and declines. The views will still be epic, and your knees will appreciate the gentler terrain.
Maintain a Healthy Weight
Let’s be honest, extra weight isn’t kind to any joint, especially the knees. Maintaining a healthy weight can significantly reduce your risk of knee pain, both on and off the trail. If you’re carrying a few extra pounds, consider incorporating weight management into your routine.
Consider Knee Braces
While not a miracle cure, knee braces can offer valuable support and stability, especially if you have pre-existing conditions. Consult your doctor to see if one is right for you and ensure a proper fitting for maximum effectiveness.
Conclude with a Warm-down
Just like you wouldn’t slam the brakes after a tough workout, dedicate 10-15 minutes to static stretches and light walking after your hike. This helps your body gradually return to its pre-hike state, reducing muscle soreness and stiffness that can contribute to knee pain.
How to Recover from Common Knee Injuries?

Sometimes, no matter how careful you are, you’ll face the fact that your knees hurt after hike efforts. Here’s my personal guide to bouncing back from common knee injuries so you can get back to conquering those trails:
1. PEACE and LOVE
Forget RICE – sports medicine has evolved, and the new protocol is PEACE and LOVE. I know it sounds like a hippie slogan, but stick with me.
In the first few days (PEACE phase):
- Protect the injured area by avoiding activities that increase pain
- Elevate your leg above your heart to reduce swelling
- Avoid anti-inflammatories – they can actually impair long-term healing
- Compress with an elastic bandage for support
- Educate yourself about your injury rather than relying solely on passive treatments
After those initial days (LOVE phase):
- Load gradually – let pain guide your return to activity
- Optimism matters – your mindset genuinely affects recovery
- Vascularization – get your blood flowing with pain-free cardio like swimming or easy cycling
- Exercise actively to restore mobility and strength
When I tweaked my knee on a descent last year, following this protocol had me back on trails two weeks faster than the old ice-and-rest approach would have.
2. Doc knows best
I learned this one the hard way. Especially for serious injuries like ligament tears or fractures, don’t hesitate to visit your doctor. Early diagnosis and proper treatment are crucial for a smooth recovery.
Here’s a good rule of thumb: most inflammatory processes last 7-10 days, so if your pain isn’t improving within that timeframe, it’s time to follow up with a professional.
I used to tough it out for weeks, thinking I just needed more rest, but that delayed recovery only made things worse. A doctor’s visit can save you a lot of pain and frustration down the line.
3. Listen to your body, not your ego
This might sound simple, but it’s crucial. Even if the mountains are calling, don’t answer until you are fully recovered after an injury. I always listen to my body’s signals. If I feel pain, swelling, or instability, I take a break or adjust my activity. Patience is key.
Bonus Tip: Consider consulting a registered dietitian. They can help you ensure you’re fueling your body with the nutrients it needs to heal properly.
At What Point Do You See a Doctor?

While most bumps and bruises heal with time and TLC, there are situations where seeking professional medical advice is crucial. Here’s when I wouldn’t hesitate to head to the doctor:
- Intense pain that doesn’t improve: If the pain is severe, constant, or worsens despite RICE and rest, it’s time to see a doctor. They can rule out serious injuries like ligament tears or fractures and recommend appropriate treatment.
- Instability or buckling: Does your knee feel loose or give way unexpectedly? This could indicate ligament damage and requires a professional evaluation to prevent further complications.
- Significant swelling or bruising: Excessive swelling or bruising that persists for several days can signal internal injuries requiring medical attention.
- Visible deformity: If your knee appears visibly deformed or bent at an unnatural angle, seek immediate medical help.
- Fever or redness: These symptoms could indicate an infection, which requires prompt antibiotic treatment.
References:
- https://www.healthline.com/health/exercise-fitness/dynamic-stretching
- https://www.healthline.com/nutrition/how-to-rehydrate


